


Your garage door is more than a simple entry point; it's a complex, heavy-duty system that protects your home, vehicles, and family. Operating thousands of times each year, it stands as one of the hardest-working pieces of equipment in your residence, often bearing the brunt of seasonal weather in areas like Scottsdale, Phoenix, and Paradise Valley. Yet, its essential maintenance is frequently overlooked until a screeching halt, a jerky motion, or a sudden failure disrupts your daily routine and compromises your home's security.
Proactive care is the most effective strategy for preventing inconvenient breakdowns, costly repairs, and ensuring long-term safety and reliability. This guide provides a detailed, step-by-step garage door maintenance checklist, empowering you with the knowledge to perform essential upkeep. We will move beyond generic advice, offering actionable insights and professional tips for each critical component of your system, from the tracks and rollers to the high-tension springs and advanced safety sensors.
Following this comprehensive checklist does more than just extend the operational life of your door and its opener. It provides invaluable peace of mind, confirming that the largest moving object in your home is functioning precisely as it should. Whether you're a homeowner in Cave Creek or a property manager in Fountain Hills, mastering these checks ensures your garage door remains a dependable asset rather than an unexpected liability. We will cover everything from hardware tightening and lubrication to balance tests and auto-reverse mechanism verification.
1. Visual Inspection and Hardware Tightening
The single most effective preventative measure in any garage door maintenance checklist is a thorough and consistent visual inspection paired with hardware tightening. Your garage door system is a complex assembly of interconnected parts that endure immense stress and vibration daily. Over time, this constant movement inevitably causes nuts, bolts, and screws to loosen, creating a cascade effect that can lead to misalignment, excessive wear, and eventual system failure. A systematic monthly inspection is your first line of defense, allowing you to identify and rectify minor issues before they escalate into dangerous problems.
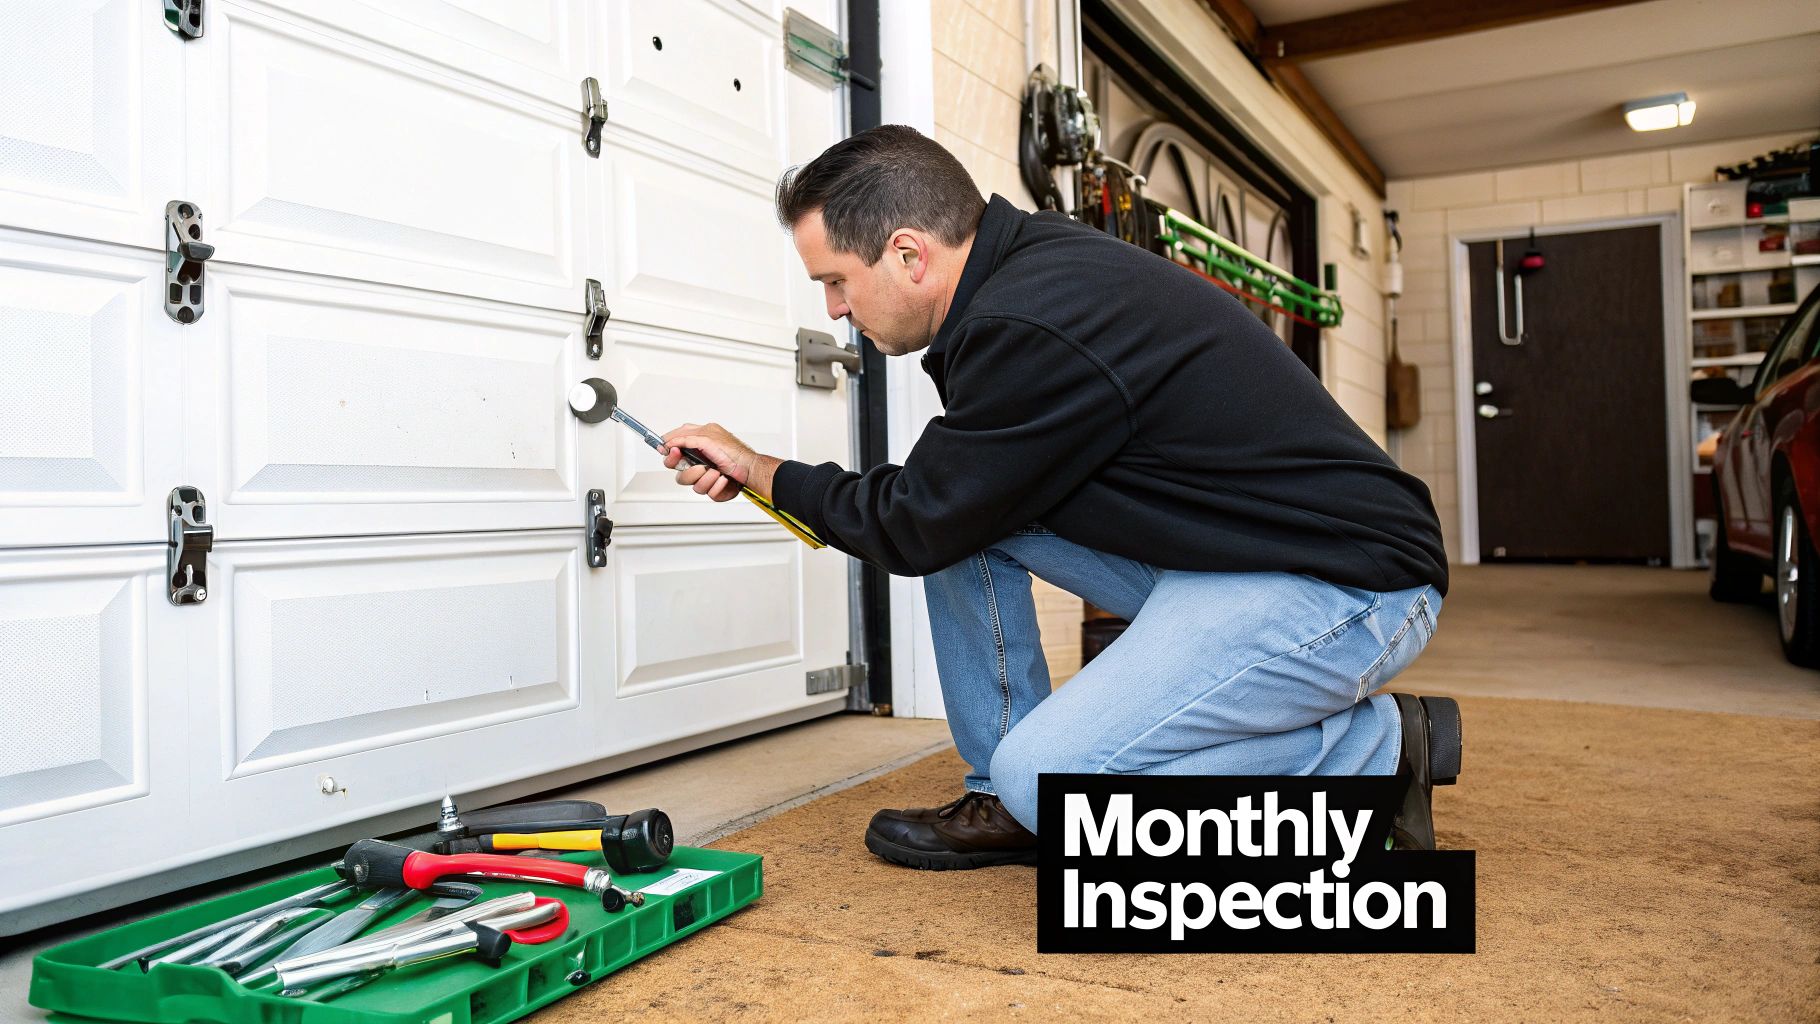
This foundational task involves carefully examining every component of your door system while it is closed and disconnected from the opener. You are looking for signs of wear, damage, rust, or anything out of the ordinary. This proactive approach has a proven impact; for instance, a suburban homeowner in Scottsdale detected a single fraying strand on a lift cable during a routine check, a discovery that prevented a potential door collapse that could have severely damaged their vehicles and posed a significant safety risk.
What to Inspect and Tighten
A methodical approach ensures nothing is overlooked. Grab a socket wrench, a step ladder, and a flashlight to begin your inspection.
- Rollers: Check for cracks, chips, or significant wear. Nylon rollers should spin freely without wobbling, while steel rollers should be intact.
- Hinges: Look for cracks or signs of stress, especially where the hinge attaches to the door panel.
- Cables: Examine the high-tension lift cables for any signs of fraying, broken strands, or rust. Crucially, do not touch or attempt to adjust these cables yourself. They are under extreme tension and can cause severe injury.
- Tracks: Inspect both the vertical and horizontal tracks for dents, bends, or signs of misalignment. Ensure they are clear of debris.
- Hardware: Systematically go through all visible nuts and bolts on the hinges, roller brackets, and the track mounting system. Use a socket wrench to gently but firmly tighten anything that has become loose.
Actionable Tips for a Consistent Inspection
To make this crucial task a regular habit, consider these practical tips:
Key Insight: Property management companies that implement quarterly inspection protocols across large portfolios report a significant reduction in breakdown incidents, often as high as 35%. This demonstrates the direct correlation between regular inspections and long-term system reliability.
- Create a Checklist: Develop a physical or digital checklist to ensure you examine the same components in the same order each month.
- Document with Photos: Take pictures of key components like rollers, hinges, and cable connections during each inspection. This creates a visual history that makes it easier to track wear and deterioration over time.
- Focus on the Bottom: Pay special attention to hardware near the bottom of the door, as this area is most exposed to moisture from rain and cleaning, leading to a higher risk of rust and corrosion.
- Mark Your Calendar: Treat this task like any other important appointment. Set a recurring reminder on your calendar for the first weekend of every month to perform your garage door inspection.
2. Lubrication of Moving Parts
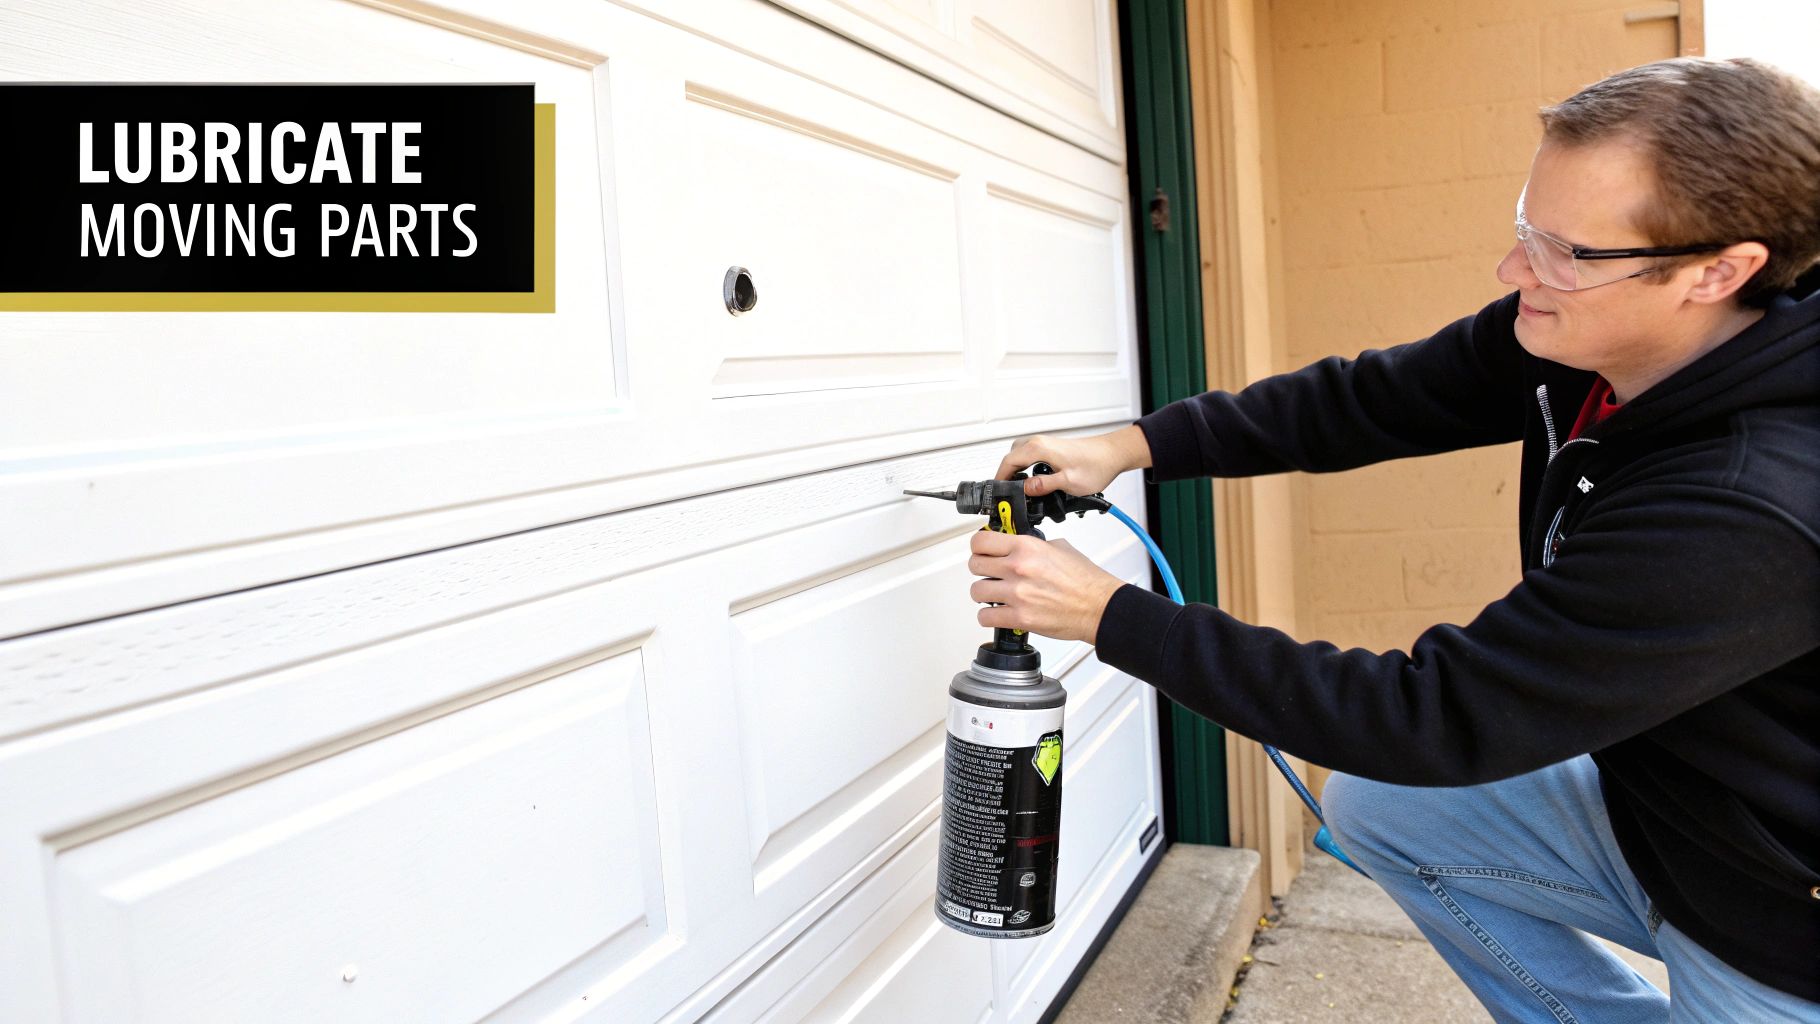
Following a visual inspection, the next critical step in any garage door maintenance checklist is the systematic lubrication of all moving parts. A garage door operates through a network of metal components that are in constant motion and under significant strain. Proper lubrication is the lifeblood of this system, drastically reducing friction, which in turn minimizes operational noise, prevents premature wear, and ensures the door moves smoothly and efficiently along its tracks. Neglecting this task forces the opener motor to work harder, leading to burnout, and accelerates the degradation of rollers, hinges, and springs.
This essential maintenance task involves applying a specialized lubricant to key friction points, protecting them from wear and corrosion. The impact of a consistent lubrication schedule is well-documented; a commercial facility managing 12 high-traffic loading bay doors reported a 60% reduction in service calls after implementing a quarterly lubrication protocol. For homeowners in coastal areas like Paradise Valley or Fountain Hills, monthly lubrication is a powerful preventative measure against the accelerated corrosion caused by salt in the air, preserving the system’s integrity.
What to Lubricate
Using the right product is just as important as the application itself. Avoid heavy greases or standard WD-40, which can attract dirt and gum up the mechanisms. Instead, opt for a silicone or lithium-based spray lubricant designed specifically for garage doors.
- Hinges: Apply lubricant to all pivot points on each hinge.
- Rollers: Target the bearings inside the rollers. If you have nylon rollers without exposed bearings, lubricate the stems where they fit into the brackets. Do not lubricate the nylon wheel itself.
- Springs: With the door closed and the springs relaxed, apply a light, even coat along the entire length of the torsion springs. This reduces the grinding noise they often make as the coils rub together.
- Bearings: Lubricate the end bearings on the main torsion bar and the central bearing plate above the door.
- Tracks: Wipe the inside of the tracks clean with a rag, but do not lubricate the tracks themselves. Lubricant in the tracks will attract debris and cause the rollers to slide instead of roll, leading to damage.
Actionable Tips for Effective Lubrication
To integrate lubrication seamlessly into your maintenance routine, follow these professional-grade tips:
Key Insight: Leading manufacturers like the Chamberlain Group and Clopay Corporation emphasize that using a dedicated garage door lubricant is crucial for performance. These formulas are designed to penetrate tight spaces, resist dust accumulation, and provide long-lasting protection without damaging plastic or rubber components, unlike many general-purpose oils.
- Prep the Surface: Before applying any new lubricant, use a clean cloth to wipe down all components, removing old lubricant, dirt, and grime for a more effective application.
- Cycle the Door: After applying the lubricant to all specified parts, run the garage door up and down three to four times. This action fully works the lubricant into the bearings and pivot points, ensuring even distribution.
- Protect Your Floor: Place a piece of cardboard or a drop cloth on the garage floor beneath the door to catch any excess drips and prevent stains on the concrete.
- Be Precise: Use the straw applicator that comes with most spray lubricants for a targeted application, minimizing overspray and waste. A little goes a long way; a light coat is more effective than a thick, messy one.
3. Track Cleaning and Alignment Check
A smooth, quiet garage door operation is directly dependent on the condition of its metal tracks. These tracks act as the precise guideways for the door's rollers, but over time they accumulate dirt, cobwebs, and hardened grease. This buildup can obstruct the rollers, causing the door to bind, stutter, or jam, which puts unnecessary strain on the opener motor and other components. A regular cleaning and alignment check is a critical part of any garage door maintenance checklist, ensuring the door moves freely and efficiently, thereby preventing premature wear and potential operational failures.
This maintenance step is both simple and highly effective. For instance, a DIY-savvy homeowner in Phoenix was able to completely resolve a frustrating binding issue on their door simply by cleaning out years of hardened grime from the tracks and making a minor quarter-inch alignment adjustment. Similarly, a warehouse operation in an industrial park caught a minor track misalignment during a routine check, a discovery that helped them avoid a costly $1,200 track replacement and the associated operational downtime. These examples highlight how proactive care preserves the system's integrity.
What to Clean and Align
Proper track maintenance involves more than just a quick wipe-down. It requires a detailed inspection and precise measurements to guarantee perfect alignment. You will need a stepladder, a damp cloth, a household cleaner, a tape measure, and a level.
- Track Interior: Begin by wiping the inside of both the vertical and horizontal tracks with a cloth lightly dampened with a household cleaner. Your goal is to remove all dirt, grease, and debris. It is critical not to lubricate the tracks themselves, as this will attract more dirt and cause the rollers to slide instead of roll.
- Vertical Alignment: Use a level to ensure both vertical tracks are perfectly plumb (straight up and down). Misalignment here can cause the door to bind as it moves.
- Track Spacing: The tracks should have a consistent gap between them and the door panels, typically around 1/2 inch, to allow the rollers to move without friction.
- Horizontal Alignment: Measure the distance from the garage wall or ceiling to the back of the horizontal tracks on both sides. These measurements should be identical to ensure the door remains level when fully open.
- Track Condition: Inspect the tracks for any dents or bends. Minor dents can often be gently tapped out using a rubber mallet against a block of wood placed inside the track.
Actionable Tips for a Consistent Inspection
Integrating this task into your routine ensures your garage door operates smoothly year-round. These tips will help you perform the check correctly and safely.
Key Insight: Property management firms for large apartment complexes report that implementing annual track cleaning and alignment verification prevents up to 80% of resident complaints related to jamming or noisy garage doors, significantly reducing maintenance calls.
- Loosen, Don't Remove: If you find the tracks need a minor adjustment, slightly loosen the mounting brackets. Do not fully remove the bolts. Tap the track gently into the correct position and then firmly re-tighten the hardware.
- Measure Twice: Accuracy is key for alignment. Double-check your measurements with your level and tape measure before and after making any adjustments to ensure precision.
- Factor in the Elements: Extreme temperature fluctuations can cause the structure of your garage to shift slightly, impacting track alignment. If you're looking for ways to prepare your garage door for seasonal changes, understanding how weather impacts garage door maintenance on securitygarageandgate.com can provide valuable context.
- Know Your Limits: If you discover that the tracks are severely bent, rusted, or damaged, it is best to call a professional. Attempting to repair significant damage without the proper tools and experience can lead to further problems and safety risks.
4. Safety Sensor Testing and Cleaning
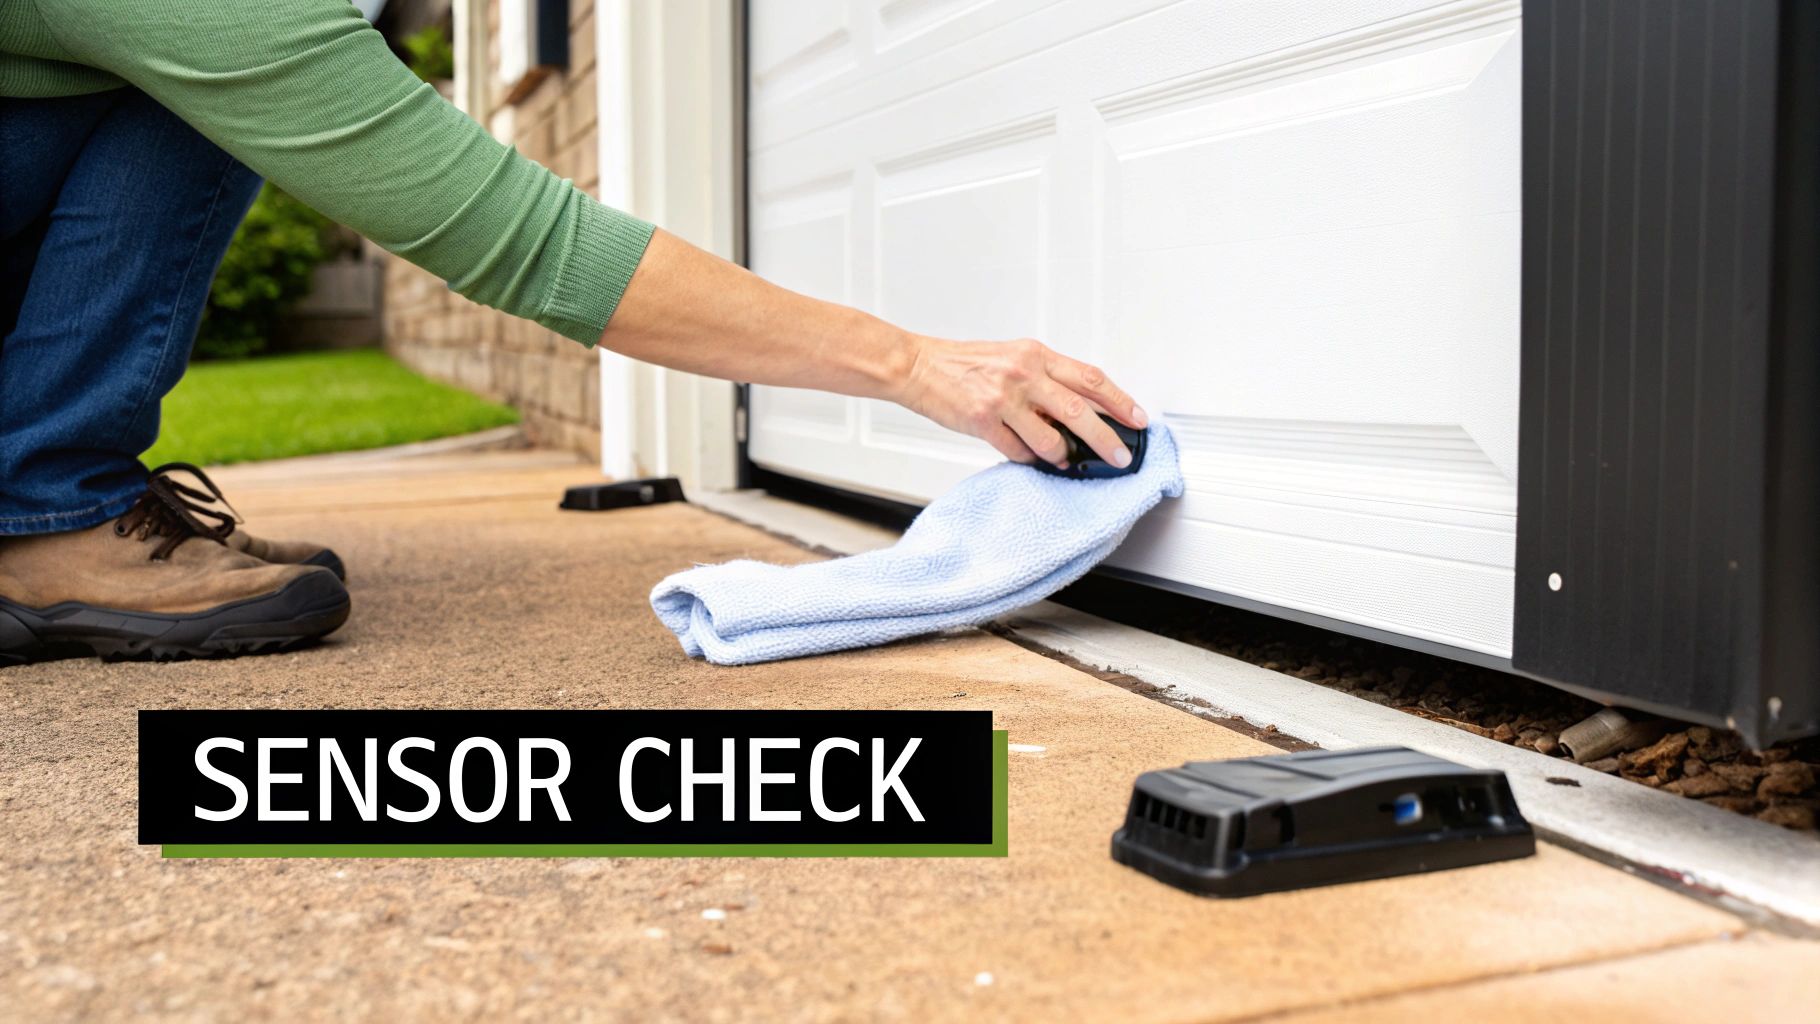
A foundational element of any modern garage door maintenance checklist is the regular testing and cleaning of the photo-eye safety sensors. These small but crucial devices, mounted near the floor on either side of the door opening, project an invisible infrared beam. If this beam is broken by a person, pet, or object while the door is closing, the system is designed to immediately reverse direction, preventing potentially catastrophic accidents. Neglecting these sensors is a significant liability, as dust, debris, misalignment, or wiring issues can render this essential safety feature completely ineffective.
This simple maintenance task directly addresses the most critical safety function of your automated garage door. Since the U.S. Consumer Product Safety Commission mandated their inclusion on all openers manufactured after 1992, these sensors have been credited with preventing thousands of injuries and fatalities. A parent in Texas, for example, credited a routine monthly sensor test with revealing a misalignment that could have otherwise endangered her toddler playing near the garage. Regularly verifying their function is not just about compliance; it's about active, responsible home safety.
How to Test and Clean Your Sensors
This process is straightforward and should be performed monthly to ensure consistent operation. You will not need any special tools, just a soft cloth and a moment of your time.
- Obstruction Test: Start by closing the garage door. As it descends, place a stable object like a cardboard box or a roll of paper towels in the door's path. The door must immediately stop and reverse course upon the object breaking the sensor beam. If it does not, the sensors require immediate attention.
- Lens Cleaning: Using a soft, dry cloth, gently wipe the lenses of both the sending and receiving sensors. Cobwebs, dust, and grime can accumulate and obstruct the beam, causing the door to operate erratically or not close at all.
- Alignment Check: Look at the small indicator lights on each sensor unit. Typically, these lights should be solid (one green, one amber/red) when the alignment is correct. If a light is blinking, it indicates the sensors are not properly aligned and cannot "see" each other.
- Bracket Inspection: Gently check if the mounting brackets holding the sensors are secure. Vibrations from the door's operation can loosen them over time, leading to misalignment. Tighten any loose screws or bolts.
Actionable Tips for Sensor Reliability
Integrating these checks into your routine ensures this life-saving feature remains dependable.
Key Insight: Many modern smart home systems, such as Chamberlain's MyQ platform, now integrate sensor status monitoring. These systems can send alerts directly to a homeowner's smartphone if the sensors are obstructed or misaligned, providing a real-time diagnostic tool that enhances safety and simplifies troubleshooting.
- Trace the Wires: Visually inspect the low-voltage wires running from the sensors to the motor unit. Look for any signs of fraying, pinching, or damage from pests, which can disrupt the connection.
- Avoid Harsh Chemicals: Never use abrasive cleaners or harsh chemicals on the sensor lenses, as they can permanently scratch or fog the plastic, impairing their function.
- Manage Sunlight: If your garage opening faces direct sunlight at certain times of the day and you experience issues, the intense light might be interfering with the infrared beam. Consider installing a simple sun shield or protector around the sensor.
- Never Bypass Sensors: Under no circumstances should you ever disable or bypass your safety sensors to force the door to close. This creates an extremely dangerous situation and defeats the primary safety mechanism of the entire system.
5. Weatherstripping Inspection and Replacement
Often overlooked in a standard garage door maintenance checklist, the weatherstripping is a critical component for protecting your garage interior from the elements. This system of vinyl and rubber seals lining the bottom, sides, and top of your door is your primary defense against water intrusion, dust, drafts, and pests. Over time, constant exposure to UV rays, temperature fluctuations, and the physical compression from opening and closing causes these seals to become brittle, cracked, and ineffective. A biannual inspection and timely replacement are essential for maintaining energy efficiency, preventing water damage, and securing the garage from unwanted intruders.
The impact of functional weatherstripping is significant and measurable. For example, energy auditors consistently identify worn garage door seals in over 60% of home inspections as a notable source of energy loss. Similarly, a homeowner in a high-rainfall area like Florida was able to prevent garage flooding during a severe storm simply by replacing a worn bottom seal and adding a new threshold seal, a proactive measure that saved thousands in potential water damage repairs.
What to Inspect and Replace
A careful examination is key to determining the health of your weatherstripping. You are looking for any loss of flexibility or visible damage that could compromise the seal.
- Bottom Seal (Astragal): This is the most critical seal and takes the most abuse. Check for cracks, tears, brittleness, or areas where it has been compressed completely flat.
- Perimeter Seals: Inspect the vinyl or rubber stripping along the sides (jambs) and top of the door frame. Ensure it is pliable and makes firm contact with the door when closed.
- Gaps and Light: With the garage door closed and the interior lights off, look for any daylight seeping in around the edges. Any visible light indicates a breach in the seal.
- Material Integrity: Gently press and bend a section of the seal. If it feels hard and doesn't flex easily, or if it cracks under pressure, its protective qualities are diminished and it needs replacement.
Actionable Tips for a Consistent Inspection
Incorporate weatherstripping checks into your seasonal home maintenance routine, particularly in the spring and fall when temperatures are changing.
Key Insight: Homeowners in northern climates who replace worn garage door weatherstripping often report a tangible reduction in their home heating costs, sometimes by as much as 10-15%, by preventing cold air infiltration into the garage and adjacent living spaces.
- Perform the Light Test: The easiest and most effective diagnostic is the flashlight test. Have someone shine a bright flashlight around the perimeter of the door from the outside at night while you stand inside. Mark any areas where light penetrates.
- Measure First: Before purchasing a replacement bottom seal, accurately measure the width of your garage door and the style of the retainer track (e.g., T-channel, L-channel). This ensures you get the correct part for a seamless fit.
- Use a Lubricant for Installation: Applying a small amount of dish soap to the tracks of the retainer makes sliding the new weatherstripping into place significantly easier. For a detailed guide on this process, you can learn more about how to install garage door weather stripping.
- Consider a Threshold Seal: For homes in areas with heavy rain or wind-driven snow, adding a threshold seal on the garage floor where the door closes can provide an extra layer of protection against water intrusion.
6. Balance Test and Spring Inspection
A properly balanced garage door is the cornerstone of a safe and efficient system, and its balance is entirely dependent on the health of the high-tension springs. The balance test is a critical diagnostic in any garage door maintenance checklist, designed to verify that the springs are correctly counteracting the door's weight. An imbalanced door forces the automatic opener to lift and lower a weight far greater than it was designed for, leading to accelerated wear on the motor, gears, and drive train. Regular testing and inspection prevent this strain, extending the opener's lifespan and mitigating the risk of sudden, catastrophic spring failure.
This vital check directly addresses the single most common and dangerous point of failure in a garage door system. Data from opener manufacturers like LiftMaster reveals that up to 30% of premature motor failures are directly caused by imbalanced doors. A homeowner in Paradise Valley, for example, performed a routine balance test and found their door slammed shut, indicating a severely weakened spring. A subsequent professional inspection revealed the spring was on the verge of breaking, a situation that could have resulted in the door crashing down unexpectedly.
How to Test Balance and Inspect Springs
This test should be performed semi-annually. Under no circumstances should you ever attempt to adjust, repair, or replace the springs yourself. The immense tension they hold can cause severe injury or even death. Learn more about the dangers of garage door springs on securitygarageandgate.com.
- Disconnect the Opener: First, close the garage door completely. Then, pull the red emergency release cord to disengage the door from the opener trolley. Ensure the power to the opener is disconnected to prevent accidental activation.
- Perform the Lift Test: Manually lift the door to about halfway up, approximately three to four feet from the floor. Carefully let it go. A properly balanced door should stay in place, moving only slightly up or down.
- Interpret the Results: If the door slams shut, the springs are weak and no longer providing enough tension. If the door shoots upward, the springs have too much tension. Either result indicates an imbalance that requires immediate professional adjustment.
- Visually Inspect the Springs: With the door closed, carefully look at the springs (torsion springs above the door or extension springs along the sides). Check for signs of rust, gaps between the coils, or an elongated, stretched appearance. Do not touch them.
Actionable Tips for Spring Safety
Integrating these practices into your routine ensures you stay ahead of potential spring-related issues.
Key Insight: The International Door Association (IDA) identifies spring failure as the most frequent garage door repair issue. Concurrently, emergency rooms treat an estimated 20,000 garage door-related injuries each year, many of which are linked to unsafe handling of high-tension springs.
- Test on a Schedule: Set a recurring calendar reminder to perform the balance test every six months, for instance, during daylight saving time changes.
- Listen for Trouble: A sudden, loud bang from your garage is a common indicator that a spring has broken. If you hear this, do not attempt to open the door with the automatic opener.
- Replace in Pairs: Torsion springs are installed at the same time and endure the same number of cycles. If one breaks, the other is likely near the end of its life. Always have a professional replace them as a pair to ensure even tension and a balanced door.
- Document Installation: When new springs are installed, ask the technician to mark the installation date on the spring or nearby wall. This helps track their lifespan, as most are rated for about 10,000 cycles.
7. Opener Maintenance and Auto-Reverse Testing
The garage door opener is the motorized heart of your entire system, and its consistent, safe operation is paramount. Comprehensive opener maintenance goes beyond simple checks; it involves a detailed examination of the motor, drive mechanism, and, most critically, its life-saving safety features. The auto-reverse function is a non-negotiable safety system mandated by federal law, designed to prevent crushing injuries and property damage by reversing the door's direction if it encounters an obstruction while closing. Regular testing and maintenance ensure this crucial feature works flawlessly and that the opener itself operates efficiently, quietly, and reliably for years to come.
Neglecting the opener can lead to sudden failures and significant safety hazards. For instance, a homeowner in Arizona detected a faint burning smell during a routine opener inspection, a warning sign of an impending motor failure that could have led to a garage fire. Professional service companies report that an estimated 40% of opener failures are preventable with the kind of regular maintenance outlined in a thorough garage door maintenance checklist. These checks confirm that the opener's internal mechanics and external safety systems are functioning in perfect harmony.
How to Test and Maintain Your Opener
A systematic approach to opener maintenance is essential for both safety and longevity. You will need a stepladder and potentially a few basic tools as specified by your opener's manufacturer.
- Test the Auto-Reverse Mechanism: Place a 2×4 piece of wood flat on the ground directly in the door's path. When the closing door makes contact with the wood, it should immediately and automatically reverse direction. If it doesn't, disconnect the opener and call a professional technician immediately.
- Test the Photo-Eye Sensors: With the door open, block one of the photo-eye sensors at the bottom of the door tracks with an object. Press the button to close the door. The door should not move down; instead, it should reverse or the opener lights should flash, indicating the obstruction was detected.
- Check the Manual Release: Pull the red manual release cord to disconnect the opener from the door. You should be able to lift the door by hand smoothly and with moderate effort. This ensures you can open the door manually during a power outage.
- Inspect the Drive Mechanism: For a chain drive, check the tension (typically about 1/2 inch of slack) and apply a specialized garage door lubricant. Do not lubricate a belt drive. For both, look for signs of wear or damage.
- Clean and Inspect: Vacuum the motor housing to remove dust and cobwebs. Check the wiring for any loose connections or damage.
Actionable Tips for Opener Safety and Longevity
Integrating these tests into your monthly routine is crucial for maintaining a safe and reliable system.
Key Insight: A comprehensive study by Consumer Reports found that homeowners who perform regular, documented opener maintenance can extend the operational lifespan of their unit by an average of five to seven years, significantly delaying the cost of a full replacement.
- Test Force Sensitivity: As the door is closing, place your hands at the bottom and apply gentle upward pressure. The door should reverse easily. If it requires significant force to stop, the force settings may need adjustment.
- Update Security Codes: For older models, reprogram your remote and keypad codes annually to enhance security. Modern smart openers, like those from Chamberlain's MyQ line, often handle this through secure app interfaces.
- Use the Right Light Bulbs: Use vibration-resistant "rough service" or LED bulbs specifically designed for garage door openers. Standard incandescent or CFL bulbs can fail quickly from vibration and their frequencies can interfere with remote signals.
- Know Your Manuals: Keep the manufacturer's manual handy. It contains specific instructions for adjusting settings and troubleshooting issues unique to your model. For an in-depth guide, you can learn more about how to adjust a garage door opener on securitygarageandgate.com.
The following decision tree simplifies the critical safety testing process, guiding you through the essential checks for your opener's auto-reverse and force sensitivity functions.
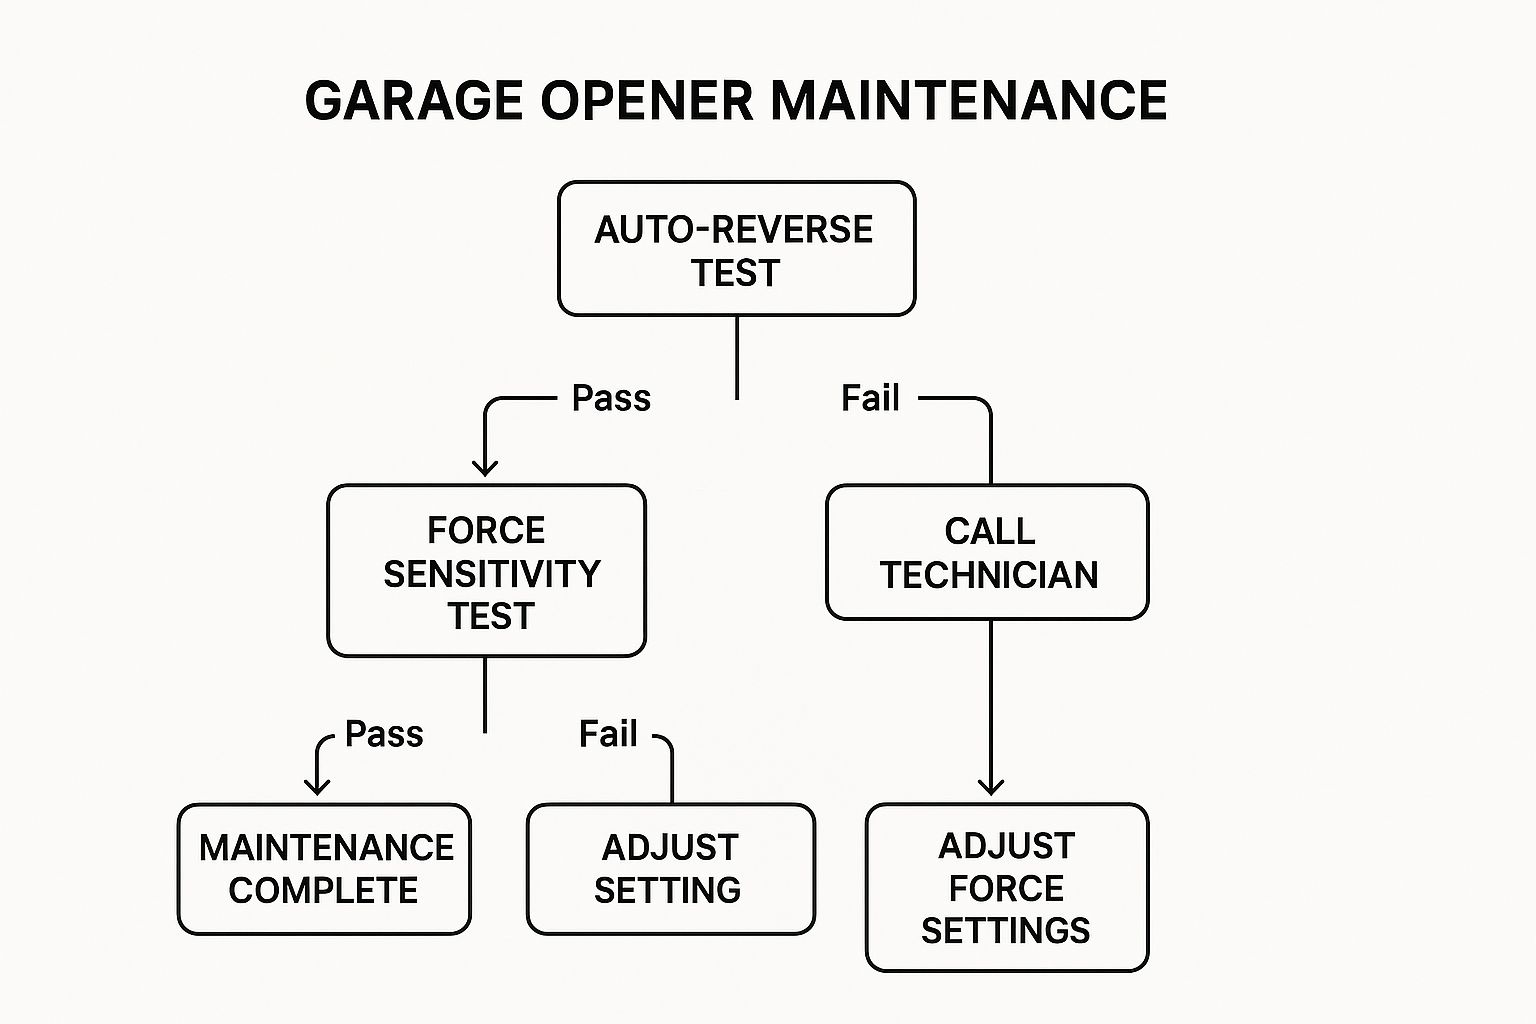
This flowchart clearly shows that a failure in the initial auto-reverse test is a critical issue that necessitates immediate professional attention to ensure the safety of your household.
Garage Door Maintenance Checklist Comparison
| Maintenance Task | Implementation Complexity 🔄 | Resource Requirements ⚡ | Expected Outcomes 📊 | Ideal Use Cases 💡 | Key Advantages ⭐ |
|---|---|---|---|---|---|
| Visual Inspection and Hardware Tightening | Low to moderate (basic tools, ladder) 🔄 | Basic hand tools, 15-20 minutes ⚡ | Early issue detection, extends component lifespan 📊 | Routine monthly DIY maintenance 💡 | Prevents costly repairs, improves safety, no special tools needed ⭐ |
| Lubrication of Moving Parts | Low (spray lubricant application) 🔄 | Garage door lubricants, 10-15 mins ⚡ | Reduced noise, smoother operation, extended part life 📊 | Regular 3-6 month maintenance, noisy door fixes 💡 | Prevents rust and wear, improves efficiency ⭐ |
| Track Cleaning and Alignment Check | Moderate (requires tools, precise adjustments) 🔄 | Cleaning supplies, level, wrench ⚡ | Prevents door binding, smooth operation, reduces wear 📊 | Quarterly cleaning, bi-annual alignment checks 💡 | Easy DIY, prevents jams and derailment, reduces motor strain ⭐ |
| Safety Sensor Testing and Cleaning | Low (simple testing and cleaning) 🔄 | Soft cloth, monthly test, LED check ⚡ | Ensures safety function, prevents injury and damage 📊 | Monthly safety check, homes with children/pets 💡 | Critical safety feature, quick test, legally required ⭐ |
| Weatherstripping Inspection and Replacement | Moderate (inspection and replacement skill needed) 🔄 | Replacement seals, measuring tools ⚡ | Improved energy efficiency, pest/water blocking 📊 | Bi-annual inspection, seal replacement every 2-5 years 💡 | Reduces energy costs, prevents damage and pests ⭐ |
| Balance Test and Spring Inspection | High (dangerous, requires professional help) 🔄 | Professional service recommended ⚡ | Safety assurance, prolongs opener life, prevents failures 📊 | Semi-annual balance test, quarterly spring inspection 💡 | Identifies spring issues, prevents injuries, critical for safety ⭐ |
| Opener Maintenance and Auto-Reverse Testing | Moderate to high (requires technical knowledge) 🔄 | Basic tools, possibly ladder, 30-60 mins ⚡ | Ensures safety and efficient opener operation 📊 | Monthly safety tests, quarterly full maintenance 💡 | Extends opener life, maintains warranty, prevents failures ⭐ |
Integrating Maintenance into Your Home Care Routine
You have now walked through the essential seven pillars of a comprehensive garage door maintenance checklist. From the simple yet crucial visual inspection and hardware tightening to the life-saving auto-reverse test, each step plays a distinct role in the symphony of your garage door's operation. This isn't just a list of chores; it's a strategic framework for transforming a potential source of frustration and unexpected expense into a reliable, secure, and seamlessly functioning asset for your home.
Think of it this way: your garage door is likely the largest and heaviest moving object in your residence. Neglecting it is like ignoring the check engine light on your car. The small, manageable tasks detailed in this guide, such as lubricating moving parts and cleaning the tracks, are your routine oil changes. They prevent minor friction from escalating into catastrophic component failure, ensuring every movement is smooth, quiet, and efficient.
From Checklist to Habit: A Proactive Approach
The true value of this garage door maintenance checklist is realized when it moves from a one-time project to a recurring habit. Consistent upkeep demystifies the system, empowering you to identify the subtle signs of wear and tear before they become urgent problems. A fraying cable, a misaligned sensor, or an imbalanced door are no longer hidden dangers but clear signals for action.
By integrating these checks into your home care schedule, you gain peace of mind. You cultivate a proactive relationship with your home's systems rather than a reactive one. Here’s a practical way to schedule these tasks:
- Monthly Quick-Checks (5-10 Minutes):
- Perform a rapid visual inspection.
- Test the safety sensors and the auto-reverse mechanism.
- Bi-Annual Deep Dives (30-45 Minutes):
- Complete all seven steps of the checklist.
- This is the time for thorough lubrication, hardware tightening, track cleaning, and the balance test.
This structured approach ensures nothing is overlooked. It makes the process manageable and highly effective, embedding the principles of preventive care into the rhythm of your household management. For property managers and HOA board members in communities across Scottsdale, Phoenix, and Paradise Valley, establishing such a standardized checklist for all properties can significantly reduce emergency service calls and enhance resident safety and satisfaction.
Recognizing the Limits and Prioritizing Safety
While this guide empowers you to handle the majority of routine upkeep, its most critical lesson is knowing when to stop. The immense tension stored in garage door springs can be extremely dangerous, and opener electronics can be complex. Your safety is always the top priority.
The balance test is a perfect example. You can and should perform the test yourself to diagnose a problem. However, if the test fails, the subsequent adjustment or replacement of the high-tension springs is a task exclusively for a trained and insured professional. Attempting this repair without the proper tools and expertise can result in severe injury or property damage.
Mastering this garage door maintenance checklist means embracing both your capabilities as a homeowner and your wisdom in recognizing when professional intervention is non-negotiable. By diligently performing the DIY-friendly tasks, you not only extend the life of your door but also become a more informed partner when you do need to call for expert service. You can provide specific, accurate information, leading to a more efficient and effective professional visit. Ultimately, this dual approach of consistent personal oversight and strategic professional support is the key to ensuring your garage door remains a symbol of security, convenience, and reliability for years to come.
When your maintenance checks reveal an issue that requires professional expertise, or you prefer the assurance of a comprehensive tune-up, trust the seasoned technicians at Security Door Gate and Fence. We specialize in diagnosing and resolving the complex issues your garage door maintenance checklist might uncover, ensuring every component operates at peak safety and performance. Connect with our team to schedule expert service and keep your access systems in pristine condition by visiting us at Security Door Gate and Fence.


 (480) 548-0807