


Learning how to clean garage doors is a lot simpler than most people think, but its importance goes way beyond just making your house look good from the street. Think of regular washing as essential preventative maintenance. It protects the door's finish, keeps the moving parts happy, and can save you from having to replace the whole thing prematurely. A clean door isn't just about looks—it's a smart investment in your home.
Why Cleaning Your Garage Door Is a Smart Investment
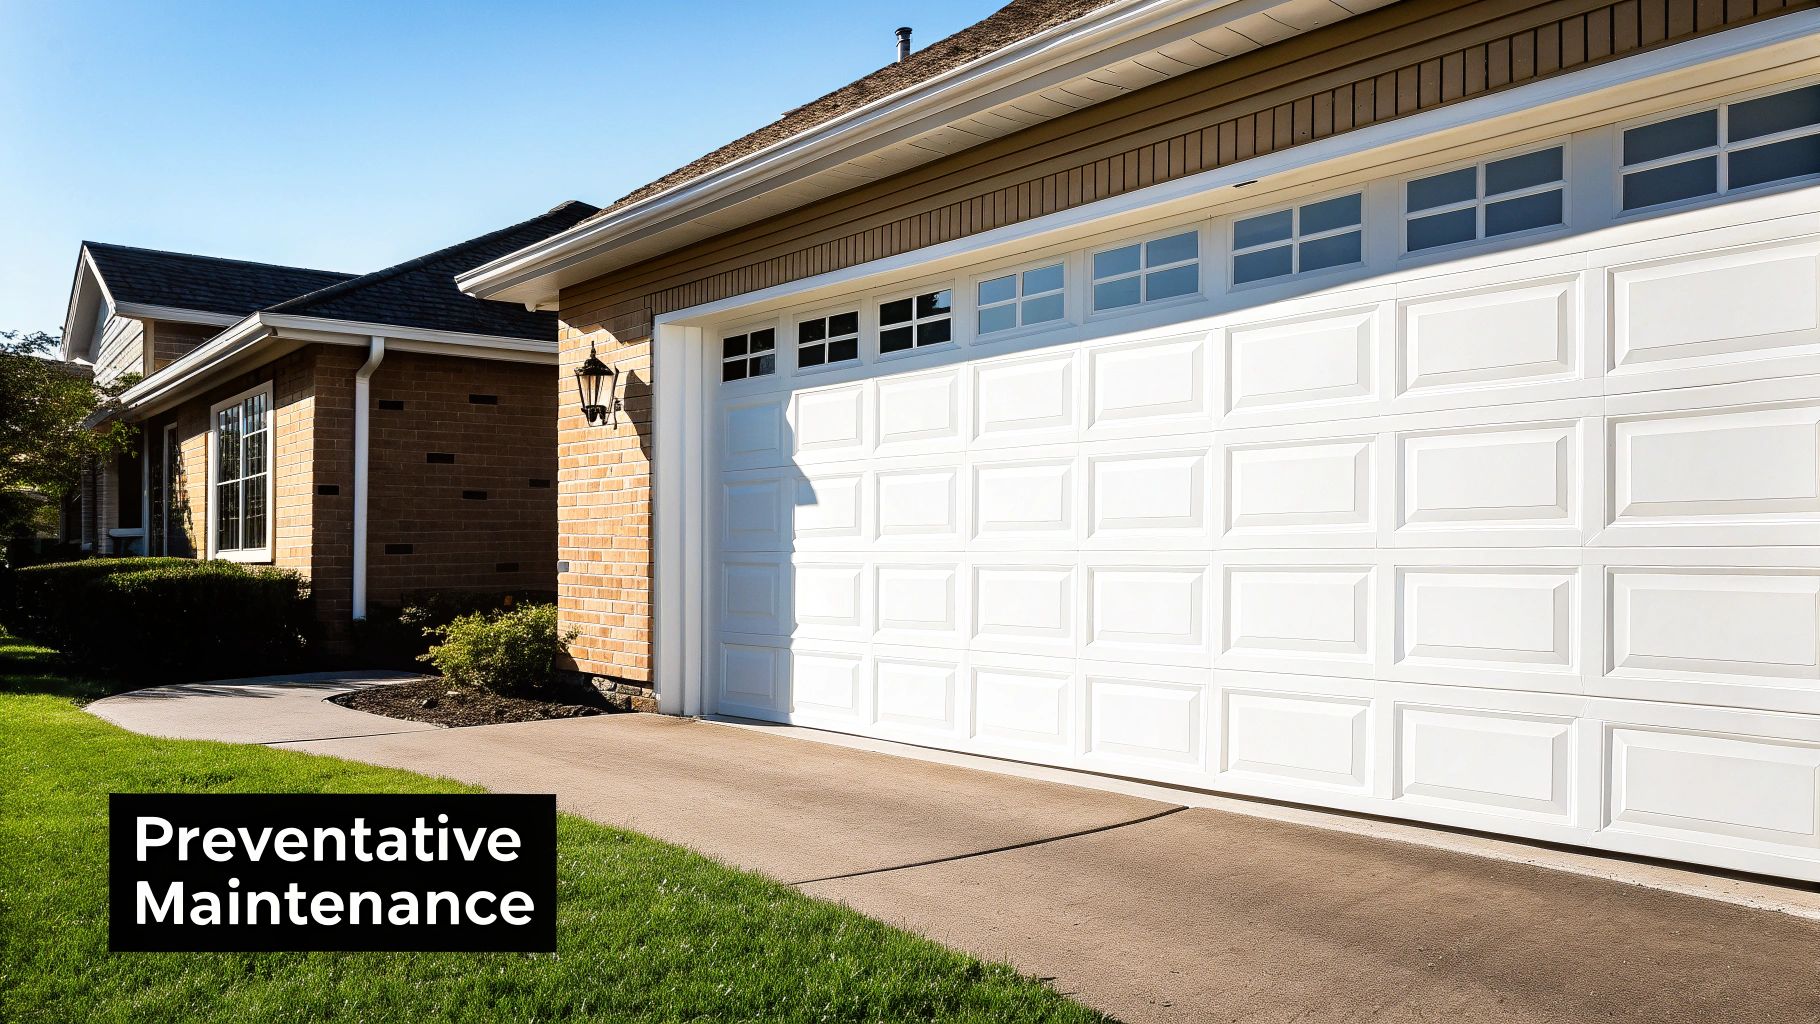
It’s easy to forget about your garage door during routine home upkeep. After all, it just goes up and down, right? But neglecting it can cause some surprisingly big issues down the road. As one of the largest moving parts of your home, it’s constantly exposed to the elements.
Over time, that layer of dirt, road salt, bird droppings, and other grime does more than just make your door look dingy. These substances are often corrosive, slowly eating away at the protective finish and leading to damage that you just can't undo.
The Hidden Costs of a Dirty Door
For steel doors, this buildup is a real menace. It traps moisture right against the metal, creating the perfect environment for rust to take hold. If you have a wood door, that same grime holds dampness that encourages rot and decay, which can compromise the door’s structural integrity.
I’ve seen this happen firsthand. A homeowner in a coastal area like Fountain Hills learned this the hard way. The combination of salty air and infrequent washing caused their steel garage door to develop rust spots within just a few years. What started as a small cosmetic issue eventually turned into a structural failure, forcing a complete and very expensive replacement. A simple, seasonal cleaning routine could have prevented the entire situation.
Beyond the door panel itself, all that gunk impacts the entire system. Dirt and debris inevitably work their way into the tracks, causing the rollers to jam or move unevenly. This puts a ton of extra strain on the opener motor, which can lead to early mechanical failures.
The Long-Term Benefits of Regular Cleaning
Properly maintaining your door also extends the life of its seals. The weatherstripping around the perimeter and between the panels is what keeps out drafts, water, and pests. When dirt grinds against these rubber or vinyl seals, they become brittle and crack, making them far less effective. You can learn more about how garage door maintenance improves security and energy efficiency in our detailed guide.
A clean door functions more smoothly, looks better, and lasts significantly longer. It's one of the most straightforward ways to protect one of your home’s largest and most frequently used features.
The numbers back this up. Industry surveys suggest that nearly 65% of garage door service calls could be prevented with just routine cleaning and inspection, yet very few homeowners actually do it. A well-maintained door can easily last 15-30 years, a huge difference compared to the 7-10 year lifespan you might see from a neglected one.
Gathering the Right Tools for the Job
Before you even think about washing your garage door, getting the right supplies together is the first step toward a great result. Using the wrong tools can make the job harder and, even worse, scratch the finish or damage the door's surface.
Think of it like washing your car—you wouldn’t use a stiff, bristly scrub brush, and the same logic applies here. Your goal is to gently lift away dirt and grime without harming the paint or sealant.
Selecting Gentle Cleaning Tools
The ideal tools are soft and non-abrasive. Why? Because stiff brushes or abrasive sponges can leave behind tiny scratches that dull the door's finish over time, making it more vulnerable to rust and fading.
- Soft-Bristle Car Wash Brush: A long-handled brush is a lifesaver. It makes reaching the top of the door much easier and safer, so you can probably skip the ladder. Look for one with bristles that are "flagged" (split at the ends) for extra softness.
- Microfiber Mitt or Sponge: For the lower sections or getting into detailed spots, a microfiber mitt is perfect. It holds a ton of soapy water and traps dirt particles, lifting them away from the surface instead of grinding them in.
This infographic gives you a quick visual of the essential supplies you'll want to have on hand.

Having these cleaning essentials ready to go just makes the whole process smoother and helps protect your door's finish.
Choosing the Right Cleaning Solution and Safety Gear
The cleaning agent you use is just as critical as your brush. Harsh chemicals can be a disaster for a garage door's finish, potentially causing discoloration, stripping protective coatings, and maybe even voiding the manufacturer's warranty.
Always opt for a gentle, pH-neutral soap. A quality car wash soap is an excellent choice because it's specifically designed to clean exterior finishes without causing damage. Just mix it with water in a bucket according to the product's directions.
Try to avoid using dish soap if you can, as some formulas have degreasers that can strip away wax or sealants. And absolutely never use bleach, abrasive powders, or harsh solvents.
Finally, let’s talk safety. Wear non-slip shoes to avoid any falls on wet concrete, and consider popping on some safety glasses to protect your eyes from splashes of soapy water or flying debris. These simple precautions are key to a successful cleaning day.
Taking care of your equipment is a core part of any home project, and these garage door maintenance tips can help you keep your entire system in top shape.
The Best Way to Wash Your Garage Door
Alright, you’ve got your supplies, so let's get to the fun part—actually washing the door. There’s a straightforward method that works for just about any material, and following it will give you a clean, streak-free finish without any headaches. The trick is to be systematic and avoid a couple of common pitfalls.
The whole process can be broken down into three simple phases: a pre-rinse, the main wash, and a final rinse and dry. Each step is designed to lift away grime without being harsh on your door's surface.
Start with a Gentle Pre-Rinse
Before you even think about touching the door with a brush, grab your garden hose. Give the entire surface a good, but gentle, rinse. Set your spray nozzle to a "shower" or "fan" setting—you definitely don't want a high-pressure jet stream here. The goal is simple: knock off all the loose dirt, dust, pollen, and pesky cobwebs that have built up.
This step is more critical than it seems. It gets all the gritty, abrasive particles off so you aren't grinding them into the paint when you start scrubbing. Think of it as clearing the deck for a deeper, safer clean. Make sure you spray everything, including the frame and the weatherstripping along the bottom.
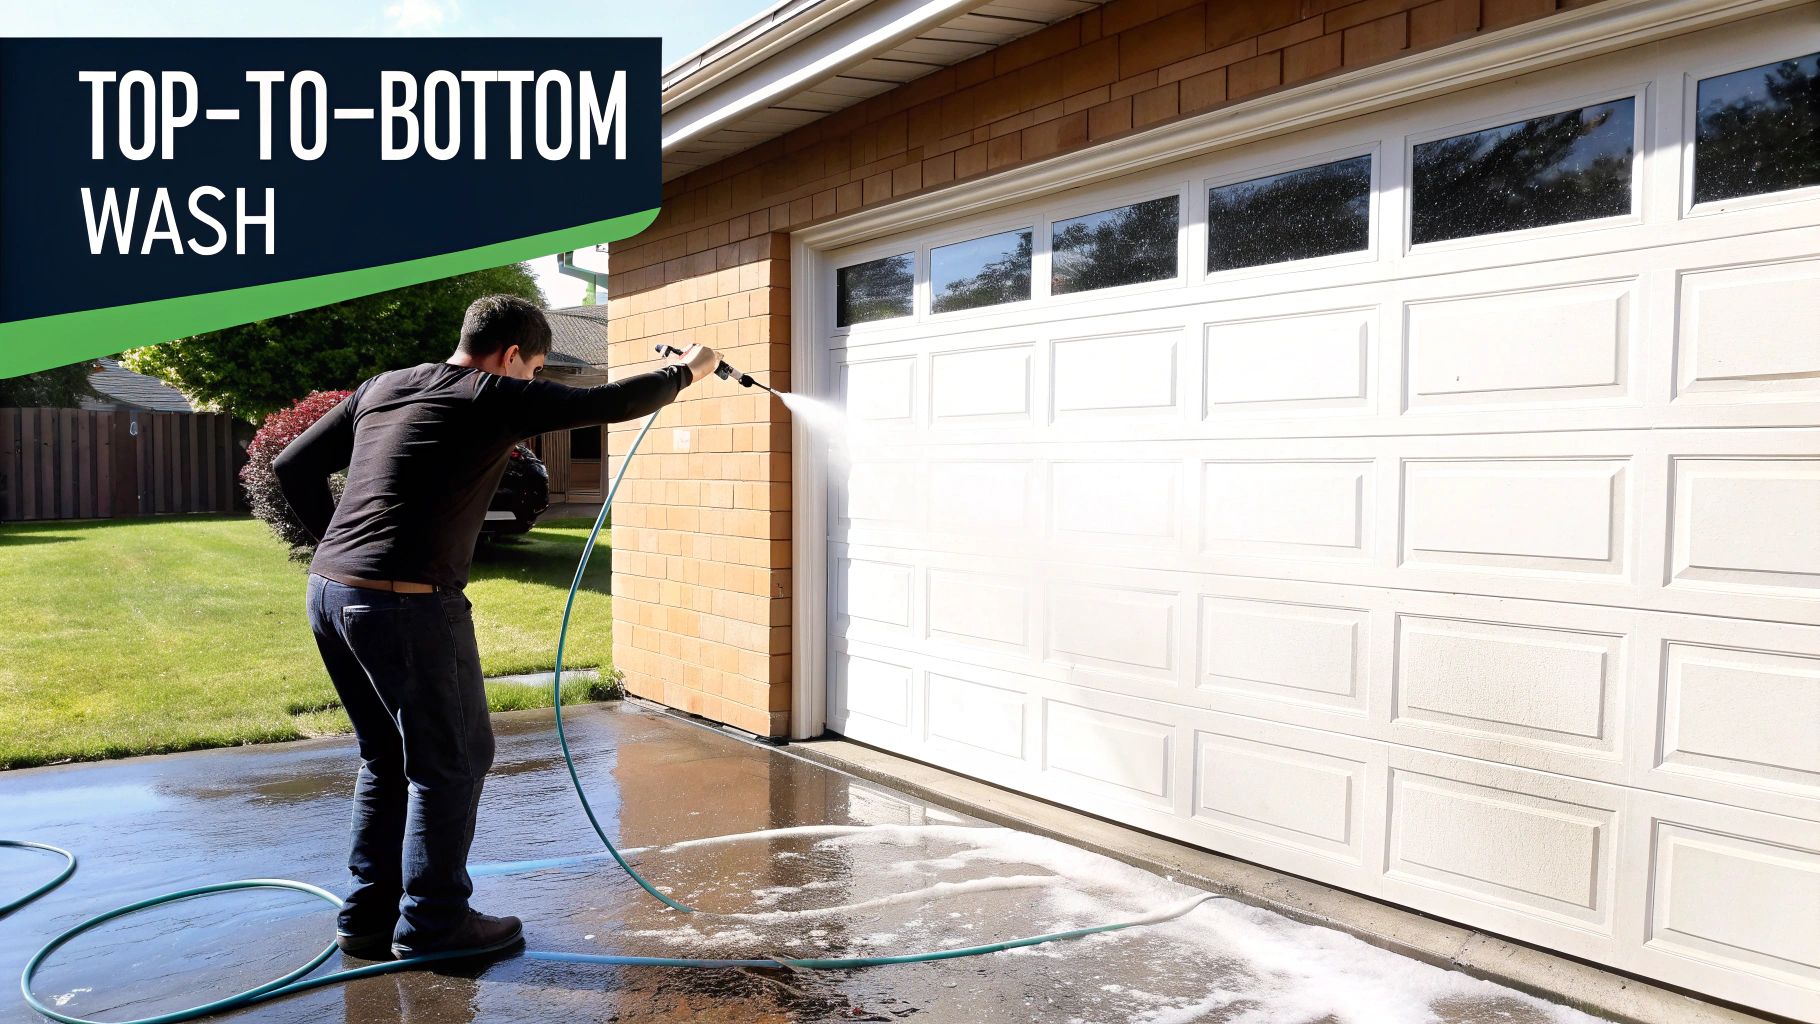
The Top-Down Washing Technique
With the loose stuff gone, it's time for the main wash. The golden rule here is to always work from the top of the door down to the bottom. This one simple tip is the secret to avoiding those ugly, dirty streaks running down the surface you just cleaned. Gravity is going to pull the sudsy, dirty water downward anyway, so work with it.
Dip your soft-bristle brush or microfiber mitt into your bucket of soapy water and tackle one section at a time. A gentle, circular motion is all you need. Let the soap do its job lifting the grime; there's no need to put a lot of muscle into it.
On hot, sunny days, the door's surface can heat up quickly, causing soap to dry almost instantly and leave behind a stubborn, chalky film. To prevent this, work in smaller, more manageable sections, rinsing each one before the soap has a chance to dry.
This is especially true for homes in sunny spots like Scottsdale or Phoenix, where that direct sun can make surfaces incredibly hot. If you can, washing in the cooler morning or late afternoon hours will make the whole job a lot easier.
For a quick summary of the process, here’s a simple breakdown.
Quick Cleaning Guide At-A-Glance
This table gives you a quick reference for the core steps in the cleaning process.
| Phase | Action | Key Tip |
|---|---|---|
| Pre-Rinse | Use a garden hose on a low-pressure setting. | Focus on removing loose dust and debris first to prevent scratching. |
| Main Wash | Scrub gently from top to bottom in sections. | Never let the soap dry on the surface, especially in direct sunlight. |
| Final Rinse | Thoroughly rinse away all soap residue. | Pay extra attention to seams and hardware where soap can get trapped. |
Following these phases in order will give you the best, most consistent results.
Finishing Touches: Windows and Hardware
If your garage door has windows, save them for the very end. Once the main door is rinsed clean, grab a separate, fresh microfiber cloth and use a dedicated glass cleaner (or a simple vinegar-and-water mix). Using the same brush or mitt you used on the rest of the door will only leave you with a streaky, smeared mess.
Don’t forget the details. A quick wipe-down of the handles, locks, and any decorative hardware makes a huge difference. These are the spots where grime loves to collect.
Finally, give the entire door one last, thorough rinse, again starting from the top. You want to be sure all the soap residue is gone, as any left behind will just attract more dirt. Let the door air-dry, or for a perfect, spot-free finish, use a clean microfiber towel or a squeegee to dry it by hand.
Tailoring Your Cleaning to Different Door Materials
When it comes to cleaning garage doors, a one-size-fits-all approach just doesn't cut it. Different materials react completely differently to cleaners, water, and even the type of brush you use. Using the wrong method can cause permanent damage like scratches, rust, or warping—turning a simple weekend chore into a costly mistake.
The very first step is knowing what your door is made of. A technique that leaves a steel door sparkling could be a total disaster for a natural wood one. This is why changing your approach isn't just a suggestion; it’s absolutely essential for keeping your door looking great for years to come.
Cleaning Steel and Aluminum Doors
Steel and aluminum are hands-down the most popular garage door materials out there, mostly because they're tough and don't ask for much maintenance. But they aren't bulletproof. Their protective coatings can get scratched up by abrasive cleaners or stiff brushes, which exposes the metal to moisture and opens the door to rust or corrosion.
When you're washing these doors, stick with a non-abrasive, pH-neutral cleaner—car wash soap is perfect for this. Grab a microfiber mitt or a soft-bristle brush, and you're good to go.
- Steer clear of harsh chemicals: Never use bleach, ammonia-based cleaners, or gritty powders.
- Go easy on the pressure: A gentle scrub is all you need to avoid scratching the finish.
- Rinse it all off: Any soap left behind will just attract more dirt and can make the surface look dull.
These simple steps are more important than you might think. Aluminum and steel doors make up over 60% of the global garage door market, and you'd be surprised how often incorrect cleaning leads to preventable damage. In fact, some studies show that using the wrong cleaning products contributes to about 12-15% of reported garage door issues each year.
Caring for Natural Wood Doors
Wood garage doors have a classic beauty that's hard to beat, but they definitely need the most specialized care. Their biggest enemy? Moisture. Too much water can soak into the wood, causing it to swell, warp, or even rot, especially if the protective sealant is old and worn out.
Before you even think about cleaning, give the door a good inspection. Look for any cracks, peeling, or thin spots in the finish. If you spot trouble areas, you'll want to get those fixed before you start washing.
The name of the game with wood doors is using as little water as possible. Never drench the surface. Instead, use a damp—not soaking wet—cloth or sponge with a mild, wood-safe cleaner.
Wipe the door down one section at a time, and immediately follow up with a dry, clean cloth to mop up any leftover moisture. For doors with more detailed designs, like those modeled after woodie plank styles, pay extra attention to all the little grooves and crevices where water loves to hide.
Techniques for Fiberglass and Composite Doors
Fiberglass doors are fantastic for getting that wood-look without all the fussy maintenance, but their finish can be delicate. Over time, that gel coat can get a chalky or faded look from sun exposure. The trick to cleaning them is bringing back their shine without causing any harm.
Just like with steel, a mild detergent and a soft cloth or sponge is the way to go. If the finish is looking a little tired and faded, some manufacturers recommend applying a high-quality car wax after the door is clean and dry. This can restore its luster and add a much-needed layer of protection against UV rays. Just be sure to test the wax on a small, hidden spot first to make sure you like the result.
Maintenance Checks to Perform After Cleaning
Once you’ve finished cleaning your garage door, don't put everything away just yet. With all the dirt and grime gone, it's the perfect time to give the whole system a quick health check. This simple inspection turns cleaning day into a proactive maintenance session, helping you spot small issues before they blow up into bigger, more expensive problems.
Taking a few extra minutes for this can make a huge difference in your door's lifespan and performance. You're looking for signs of wear and tear that are often hiding under a layer of dirt.
Inspecting Key Components
Start with a visual scan of the parts that do all the heavy lifting. Your goal is to catch any signs of damage or aging that could lead to a breakdown down the road.
- Weatherstripping: Take a close look at the rubber or vinyl seal along the bottom of the door and around the frame. You're searching for cracks, brittle spots, or any sections that are peeling away. A busted seal is an open invitation for water, pests, and drafts.
- Tracks and Rollers: Even after a good rinse, it's smart to inspect the metal tracks for any leftover debris like pebbles or leaves. Then, look at the rollers—those little wheels guiding the door. Do they look worn, cracked, or wobbly in the track?
- Hardware Check: Give all the nuts, bolts, and hinges a quick once-over. The constant vibration from the door opening and closing can easily work hardware loose over time.
Catching a cracked seal or a loose bolt early is one of the easiest ways to prevent a more serious failure. This quick check transforms a simple task like cleaning your garage door into a comprehensive upkeep routine.
Actionable Maintenance Steps
After your inspection, it’s time for a couple of simple maintenance tasks. These steps are what keep everything running smoothly year-round.
First, if you spotted any loose nuts or bolts, grab a wrench and gently tighten them. Be careful not to overtighten, as this can strip the bolt or even damage the door panel. You just want them to be snug and secure.
Next up, lubrication. Hit all the moving metal parts—this means the hinges, roller stems, and springs. Use a silicone-based or white lithium grease spray made specifically for garage doors. A word of caution: avoid using heavy oils like WD-40 on the tracks, as they tend to attract more dirt and gunk.
Finally, do a quick door balance test. With the door closed, pull the emergency release cord (usually a red handle). Now, try to lift the door by hand. You should be able to lift it with relative ease. If it feels incredibly heavy or won't stay put when you open it halfway, the springs likely need a professional adjustment.
For a more detailed guide on keeping your entire system in great shape, check out this complete garage door maintenance checklist.
Got Questions About Cleaning Your Garage Door?
Even with the best guide, a few questions always pop up. Here are the most common ones we hear from homeowners, with straightforward answers to help you get the job done right.
Can I Just Use a Pressure Washer?
It’s tempting to pull out the pressure washer and blast the dirt away, but I’d strongly advise against it. It’s usually way too much force for a garage door.
A high-pressure stream can easily chip paint right off the surface, damage the finish on a wood or fiberglass door, and even leave small dents in steel or aluminum. Worse yet, that water can get forced behind weather stripping and into small gaps, leading to rust or rot where you can’t even see it.
A regular garden hose with a decent spray nozzle has all the power you need to rinse off dirt and soap without causing any damage.
If you absolutely feel you must use a pressure washer, be extremely cautious. Use the lowest pressure setting (PSI) available and a wide-angle (40-degree) nozzle. Just as important, stand several feet back from the door to reduce the water's impact.
How Often Should I Be Cleaning My Garage Door?
The right answer really depends on where you live and what your local environment is like.
- For most homes: A good wash twice a year is perfect. Think spring and fall. This is usually enough to handle the normal buildup of dust, pollen, and everyday grime.
- For tougher conditions: If you're near the coast dealing with salt spray, live by a dusty construction site, or are in an area with industrial pollution, you'll want to clean it more often. In those cases, washing your door every three to four months is a smart move to keep corrosive materials from eating away at the finish.
What’s the Best Way to Get Rid of Tough Stains?
For stubborn spots like grease, oil, or a bit of surface rust, always start with the gentlest method first. You don't want to accidentally scratch the paint while trying to clean a small spot.
If you’re dealing with greasy fingerprints or oil splatters, a mild degreaser mixed with water and a soft cloth usually works wonders. For light surface rust on a steel door, try making a simple paste with baking soda and water. It can often lift the stain without being abrasive.
One last tip: always test a new cleaner on a small, hidden spot first, like the very bottom corner of a panel. This quick check ensures it won't discolor or damage the paint. If you're seeing significant rust, that’s a sign the door's protective coating might have failed, and it's probably time to call in a professional.
For any garage door issues that go beyond a simple cleaning—from routine maintenance to a full replacement—the experienced technicians at Security Door Gate and Fence are here to help. Contact us to make sure your door is operating safely and looking its best.


 (480) 548-0807